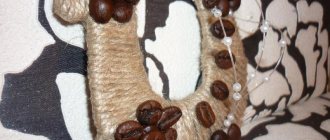
A gift made with your own hands is always the best!
If you like to surprise and delight your friends with non-standard gifts, you will definitely like this type of craft like coffee topiary. After all, all that is required to create it is simple devices and materials, accuracy and patience. Well, a drop of inspiration, of course!
Lovely work that creates a spring mood
What is topiary
DIY decorative tree made from simple and environmentally friendly materials.
The art of decorating trees dates back to Ancient Rome, only there living trees were given an unusual shape. The gardeners of Rome worked like real sculptors, creating green statues from leaves. Nuns in the Middle Ages meticulously worked on decorative trees, and during the Renaissance the art acquired a monumental scope. In the works of Dutch and English artists of the 16th and 17th centuries you can see unusual shapes of tree crowns.
Nowadays, a coffee plant is a unique souvenir that not only provides visual pleasure, but also delights with its unique coffee aroma. Even after further processing, coffee beans retain their enchanting aroma.
Let's sum it up
So, it’s quite possible to make a coffee tree with your own hands. The main thing is to start. A fun activity that will dispel all your fears about your lack of artistic ability. And the delight of your loved ones will encourage you to create new masterpieces!
The grains on the crown of the finished coffee topiary can be covered with decorative coatings: golden spray paint, varnish, and so on.
Coffee beans are a theme that gives unlimited scope for creativity: topiaries, Christmas wreaths, cards, photo frames decorated with your own hands, and much, much more
The hidden meaning of a topiary gift
Quite often, a money tree is made from coffee with your own hands as a gift. A gift of a coffee bean tree symbolizes abundance, vitality and strength. The coffee plant will become a talisman that attracts good luck, happiness, and prosperity. So when you do it yourself, you need to do it with a good message and good thoughts. With handmade jewelry, you can change your message to the person for whom the gift is intended.
A “coffee tree” souvenir, intended as a wedding gift, can be made in the form of a tree with two trunks, and at the bottom add a small coffee tree as a symbol of the future addition to the family.
For a beloved woman, a tree can look like a heart with ribbons and lace, and a man will appreciate a gift in the form of a tree with a strong trunk, as a symbol of a reliable protector and support for his other half.
On a note! A homemade gift is usually made based on the habits, lifestyle, and character of the person to whom it will be presented.
The history of coffee topiary
Historians believe that the art of creating trees using improvised means, mainly of natural origin, originated in Ancient Rome. T
Topiary began with tree branches and bushes cut at different angles in the beautiful and majestic gardens of emperors. Master gardeners could sculpt a statue or make one from a bush at the owner's request.
Nuns in medieval monasteries (in their convents) also engaged in hobbies such as garden sculpting, making artificial figurines and trees from natural materials.
Coffee topiary in the interior
Wood made from grains can look harmonious in the interior, regardless of style. It could be an apartment in an elegant classic style, a modern loft or minimalism. Topiary will look advantageous against a background of mint color and other shades of green. An original Christmas tree made from coffee beans can be placed in any room. You can decorate an outdoor gazebo or free space on the veranda with similar decor.
Such crafts are not only an addition to the design of the room, but also a symbol of well-being, prosperity and happiness. A tree always symbolizes vitality, so topiary is perfect for both women and men.
Why do you need a coffee tree?
You can make such a tree for you so that it pleases the eye and nose (coffee beans retain the aroma for a long time, spreading it around the room). Or you could try it for a friend whose birthday is coming up. After all, a tree is a wonderful souvenir.
If you are invited to a wedding, but there is no gift, then a heart-shaped coffee plant or two crowns leaning towards each other will save the situation.
Girls also give these coffee plants to boys, men, husbands, they just don’t add ribbons to them, but endow the artwork with masculine attributes. In such cases, flowers will not be needed for decoration.
Topiary will decorate the interior of the room and give the air a divine aroma. This is a natural flavoring. With the addition of glitter, tinsel and lighting elements, your tree will light up many holiday events.
Tools and materials
Prepare the following materials to make a coffee plant:
- Coffee beans. Whenever possible, try to buy quality coffee. It is recommended to choose a product with evenly roasted beans of relatively uniform size. They must be dried thoroughly. The coffee beans must be glued "flat", but this is sometimes done by placing individual beans together with the "flakes";
- The basis. Empty spaces are taken to be a heart or a ball. Such a base can be ready-made or made independently using cardboard or foam rubber;
- Wires. They are needed in almost all variations of handicraft;
- Dyeing. This material will be needed for appliqué on the product;
- Tube or stick, wire. They are necessary for the tree to have a trunk;
— Glue (it is recommended to take a glue gun);
— Plaster or alabaster (preferably using kneading tools);
- Scissors;
— Capacity for one tree. There can be many different options here: from a homemade pot and bowl to pots and jars for storage;
— Scotch tape (double-sided glue required);
- Additional decorations. Crafts can be decorated with various beads, ribbons and bows, carnations, cinnamon sticks, etc.
Candle decorated with coffee beans
Masters advise beginners to start decorating with coffee beans with the simplest things. One of the simplest options is to decorate a candle. It must be taken into account that the candle emits its own aroma. Accordingly, its aroma should be combined with the aroma of coffee.
When choosing coffee beans, the main thing is that they are roasted and without chips. When choosing coffee for decoration, you don’t have to worry about its grade and price. The cheapest coffee option will do.
Tools and materials:
- Candle
- Coffee beans
- Glue for decoupage
- Glue brush
First, choose the most beautiful coffee beans for decoration. Dip the brush into the glue and apply it to the product. Next, glue the grains with the depression inward.
Place the candle and again glue the grains in a circle, smoothly moving to the very top of the candle. After this you need to wait until the glue dries.
Light the renewed candle and throw five or six coffee beans into the melted wax to enhance the coffee aroma.
An original and easy-to-make craft, you can keep it as a flavoring agent and original room decor. This creation is very suitable as a gift.
Step-by-step instruction
At the moment, there are many variations on how to make a coffee plant with your own hands. In the instructions we offer, we will combine two technologies - creating a heart tree and a tree with a round crown, indicating possible options for further actions at the intersection.
Coffee plant step by step:
Step 1. Collect materials.
In cases where selection is necessary, the names of the elements will be given as a fraction. So, you will need:
- Coffee beans.
Advice! Drink good coffee whenever you can. Evenly roasted, graduated and shiny beans will look much better than sloppy, disproportionate beans.
Usually coffee beans are glued to topiary, but you can arrange each bean as a “ladder”
Almost any items related to coffee and tea will fit into the coffee theme in home decor: mugs, figurines with ice cream, berries, citrus fruits, etc.
- Basic part. It can be a ball or a heart: ready-made (ball/toy) or homemade from foam rubber and paper/cardboard and cotton pads. Threads are used as usual with any form creation option. You will also need brown paint to cover the base.
- The material from which the tree trunk will then be made: it can be a plastic tube / wooden stick / thick wire.
- Glue and preferably a glue gun.
- Scissors.
- Alabaster / plaster and a container for mixing the solution;
- Wooden Container: Store bought pots/pots/vase/bowl or homemade vase.
- Reliable double-sided tape.
- Decorations: beads, beads, ribbons, bows, lace, star anise, carnations, cinnamon sticks, etc.
Step-by-step instructions: how to make a crown on a coffee topiary
Step two. Working with one part.
If your topiary is round, you can use a ready-made ball (ball) or make a foam ball (this case is preferable when wire is used as a rod).
You can also take a ready-made heart, if you can find it, or cut it out of foam rubber. A sheet of foam rubber is covered with paper, wrapped with dark-colored knitting threads and painted with brown paint.
A neat, symmetrical blank for a coffee topiary crown in the shape of a heart can be made from cardboard (this will be the base) and cotton wool (will create the necessary volume)
Idea! There is another option for making a heart - two identical shapes are cut out of cardboard. Wire or other material is laid between them for support. The sheets are glued together and then glued with cotton pads until the required volume is obtained. After this, the workpiece is wrapped with threads and painted.
After the necessary procedures with the base, it is covered with glue and covered with grains. It's best when you can do it in two layers. The first should be laid with the flat side inward, the second - vice versa.
A very simple craft for beginners: a New Year's home pendant made from coffee beans glued to the base in one layer
A cone-shaped wreath and carnation star decorations are a great option for creating a coffee Christmas tree topiary
Step three. Barrel decoration.
The cane we choose is wrapped with twine/ribbon/tissue paper or other material and glued to the hair. The wire can be bent. In the case of a paper heart, the connection is made first. In other types of parts it is possible to make a small hole.
Step four. Primer.
We measure out the required volume of liquid in the container in which the tree will be planted. Preparation of gypsum / alabaster mortar. Pour into a pot or jar, insert a tree into the center and let the mixture harden. When the surface is dry, cover it with layers of coffee or other material (tea, sawdust, shavings, etc. will do).
To decorate the finished coffee topiary, in addition to ribbons, beads, dried flowers and the like, you can also use various miniature terrarium figures.
To decorate a topiary pot, it is best to use rough material.
Step five. Decoration.
You can wrap ribbons around the body, glue bows or star anise stars to the top, and place animal figures at the base. In general, here you have complete scope for imagination.
Star anise and cloves, cinnamon sticks, vanilla, dried citrus slices, etc. Best suited for decorating coffee topiaries.
You can also make accessories from the same materials for the coffee topiary, for example, small candlesticks.
Important Notes
- The grains need to be glued close to each other, closely.
- It is advisable to decorate the tree pot with paint and other available materials before starting work.
- Pieces of cotton wool work well to represent clouds or whipped cream. If you anoint a ball of cotton wool on one side, the cloud will become cheerful.
- Cinnamon sticks look very beautiful in compositions with coffee.
- Strings (such as twine) look great in 100% of cases.
- The key is perfectly associated with the image of a tree - feel free to add this element.
- Is Valentine's Day approaching or are you just preparing a gift for your loved one? Then replace the base ball with a foam heart. As a last resort, the heart can be formed from soft materials (such as a veil or cotton sponges) and wrapped with rope and coated with a little glue. By the way, if you make two layers of cotton wool, the heart will be even larger than with one layer of sponges.
- Choose coffee (beans) that are equally roasted, similar in shape, and identical in size.
- Colored paper of different thicknesses is also useful for creating a coffee masterpiece. Don't discount white office paper.
- There may not be a potty. Replace it with a piece of wood (a branch cut) into which you insert and attach the trunk.
- If you are making a romantic tree, then add a couple of candles to it in a coffee bean design (performed using the same technique as the tree itself).
- They also make photo frames and Christmas wreaths from grains.
- If you open the grains with silver paint, you will have snow-covered trees, if you use gold paint, you will have autumn trees.
- On New Year's Eve, the coffee tree turns into a Christmas tree.
- Use wooden popsicle sticks if you have one. They are useful for decoration, as well as for creating a beautiful pot-planter (glued like a fence to a pot or the base for a pot; it is best to stick sticks to tin, for example, a tin can).
- It is better to dry after covering with glue after each small detail so that you are confident in each part of the composition.
- If you make several uneven trunks from wire, wrapping them with thread after bending, you will get a Chinese mini-tree.
- By making foam balls in advance and wrapping them with woolen thread, you will save a lot of expensive material.
- To get a “country” style, the vase base needs to be decorated with a thick layer of straw, gluing it to the jar or tying it with twine or coarse rope.
Manufacturing technique
First you need to start preparing the crown of the future tree. Paint it or wrap it in fabric. This is done so that the white ball does not show through the coffee beans. As the crown dries, you can decorate the base if you want to paint it.
Order coffee beans to decorate your crown with. The nasty broken grains won't work, so feel free to remove them.
Divide into 4 portions: Use uniform, unblemished grains to coat the top and bottom. Round grains can be used to decorate the base. And small ones are suitable for small spaces.
Before you start decorating the crown, prepare a hole for the trunk. It must be at least 2.5 cm deep.
Decorating the crown is the most exciting process of wood making. Finishing can be done in several ways:
Coffee beans are glued to the base in the form of a honeycomb. You can place them on both sides, vertically or horizontally, mixing small and large grains. It all depends only on your imagination. But do not forget that the most beautiful and even ones need to be glued on top of the workpiece.
Another method will allow you to glue the ball on top, spending a minimum of time. It is best to use clear construction adhesive for this method. Apply glue directly to the ball and smear it a little, take a handful of grains and sprinkle the area covered with glue. Now you can carefully distribute the grains over the surface.
Since the hardening time of construction glue is longer than that of hot glue, this will allow you to adjust the location of the grains on the top of the future topiary. But in this case they will be placed randomly, which will not spoil your craft at all.
You can also glue the grains in two layers; with this technique there will be no gaps between the grains and the tree will turn out to be very voluminous.
When using any technique, be sure to leave space around the bore hole.
It's time to beautifully decorate the trunk of our topiary. Determining the height of the future trunk is quite simple: to the height of the pot, add half the diameter of the ball and the distance from the pot to the base of the ball.
Homemade creativity
The master class described at the very beginning of the article describes in detail, step by step, the process of making such a craft. This is just a “foundation” on which unique furnishings are built.
Using available raw materials in the process and making a little creative effort, it becomes possible to realize a unique detail that can complement any design.
For experienced craftswomen, this is another way to express attention and congratulate a loved one. Beginners who are encountering the concept of topiary for the first time will be able to easily master such needlework by following step-by-step instructions.
Coffee wood - finishing options
Classic wood is suitable for any occasion and will fit into any interior.
Add blooming flowers to the classic version - this will be an excellent gift for a woman.
If you decorate the Christmas tree with orange slices or small fruits, this option will decorate any table.
Classic topiary - step-by-step master class with photos
If you've seen photos of coffee bean topiary many times, but never tried to make it yourself, start with a classic topiary. Having mastered the technique, you can move on to creating more complex shapes.
Below are step-by-step instructions on how to make topiary for beginners:
- Paint the vase, the trunk of the future tree and the base ball with brown paint;
- Sort beans by size and appearance. Smoother and larger ones will be found in important areas of craftsmanship, small ones can fill empty spaces, and round and whole ones are suitable for decorating the “soil” in a pot;
- Make a hole in the ball for the barrel. Preliminarily outline the trunk. The depth of the hole must be at least 2 cm;
- Attach beads to the ball. You can apply glue to each grain and glue it, having previously marked the place. Alternatively, if you use clear construction adhesive, it can be applied to the ball and then sprinkled with grains. Cold glue allows the grains to move without burning your hands;
- We decorate the trunk. It can be painted or wrapped with a tourniquet / tape, having previously wrapped the barrel with double-sided tape;
- Apply glue to the barrel and insert it into the hole of the ball;
- Cover the area around the trunk with grains;
- Dilute alabaster in a container; it should have the consistency of sour cream;
- If the pot has drainage holes, glue them on top;
- Pour alabaster into the pot;
- Insert the tree trunk into the alabaster and hold for 5-7 minutes until the solution hardens;
- Let the alabaster dry completely according to the instructions;
- When the base is dry, decorate it with coffee beans, glass beads, pebbles or artificial moss;
- Tie a satin ribbon bow around the body.
Topiary "Gentleman"
If you are thinking about a gift for a man, you can move away from the idea of classic topiary and diversify it a little. To do this, buy not only a basic ball at a craft store, but also a small decorative cylinder.
A ball covered with coffee beans can be attached to a wire base. The thread can be wrapped with black tape or thread. Branches made of the same material can be attached to the wire trunk. An artificial flower can be given to your gentleman.
Place the top hat on a gentleman's head and the man's topiary is complete.
Coffee topiary with flowers
Now we will give you instructions on how to make coffee topiary at home:
- First you need to make a classic topiary according to the instructions above. Flowers can be attached to the finished product.
- Flowers can be made from plastic, polymer clay using the Kazanshi technique from ribbons.
- The flower can be hot glued directly onto the coffee or attached to a decorative canvas, lace or satin base.
- You can evenly decorate the entire coffee ball with flowers or stick 1-2 flowers to the side.
Topiary in a cup
A beautiful topiary from coffee beans can be made not only in the shape of a tree. Compositions of cups and saucers filled with coffee beans look very original.
To do this, the cup is coated with paint, pasted over the outside with coffee beans in the form of a pattern or wrapped with a rope, then glued to the saucer. It can stand or lie on a saucer.
The coffee beans are then glued to and around the cup. This composition can be supplemented with dried citrus slices, natural cinnamon sticks, star anise or clove umbrellas.
If the finished product is painted, it will be easier to care for, and if you leave the coffee and spices in their original form, the topiary will emit a very pleasant aroma.
Tree with butterflies and birds
Another idea for a spring-summer coffee topiary is a tree with butterflies, dragonflies or birds sitting on it.
Double or triple topiary
Double and triple topiary require more effort, but the result is more impressive. Crowns can branch from one trunk or “grow” from three trunks of different heights and thicknesses at once.
Coffee Valentine
This heart-shaped topiary makes a great gift for Valentine's Day and beyond. You can buy a ready-made heart-shaped base at a flower shop or make it yourself from scrap materials.
Topiary “Floating Cup”
This topiary is often called the "inverted bowl" or "flying bowl". Despite the apparent complexity, it is very simple to do. Wire and hot glue or polyurethane foam are used to make the base of the pouring cup. After watching the following video instructions, you will clearly learn and see how to make such a topiary with your own hands.
Christmas tree
A coffee plant in the shape of a Christmas tree is a wonderful decoration for a holiday table or New Year's decoration at home. You can purchase a blank or make it yourself by rolling thick paper into a cone and cutting off the excess.
Fruit trees of happiness
Making such a decorative element is quite simple: you need to supplement the basic set with dried citrus slices. Cinnamon sticks and star anise inflorescences will enhance the effect. All this will fill the living room with an exquisite aroma and add zest to the festive table setting.
In the absence of natural ingredients, decoration with artificial berries and fruits is allowed.
Coffee topiary - ideas for decoration
Many needlewomen show their imagination in the decoration of topiaries, using non-standard decorations from citrus fruits and cinnamon sticks. The following ideas are suitable for decoration:
- dried halves of aromatic citrus fruits, placed on top of each other;
- decorative element in the form of a button;
- leaves can be cut out of green felt or bay leaves can be used;
- A great addition would be cinnamon sticks tied with rope;
- As an additive, many people use cardamom seeds and peppercorns, randomly sticking them all over the piece.
A wonderful gift for a man is a topiary in the shape of a money tree. You can make a dollar or euro blank and decorate it with beans. Second decoration option: first glue a zipper onto the ball, grains around it and coins inside. The lock must be slightly open.
Money Tree
According to Feng Shui, there must be a money tree in the house, which is considered a symbol of endless wealth and profit.
A DIY money tree made from coffee and coins will be a wonderful gift for a married couple or a man.
It is made identical to the classic topiary, but first you glue coins or bills to the base, and the coffee beans are already lying around.
You can allocate money using an unzipped zipper, gluing two halves on both sides. Coins are glued not only to the base, but also to the plate, not forgetting to scatter the coins on the “ground” where the chest is located.
All that remains is to tie the Christmas tree with a red satin ribbon. By the way, the color red symbolizes profit, prosperity, and financial stability.
Making coffee topiary with your own hands is quite possible. Ready-made options are sold at a high price, and besides, a piece of the soul is put into a handmade Christmas tree, and this is expensive.
"Angels"
A more complex option is a do-it-yourself wedding topiary; photos can be found on the Internet. This original and beautiful decoration for the celebration will appeal to all newlyweds, and in order to make topiary on a glass with your own hands, you will need:
- actually, a wine glass;
- cardboard;
- scissors;
- foam ball;
- stationery knife;
- gun with glue cartridge;
- a string of beads and half-beads, a figurine of angels, hairpins with rhinestones, roses made of foam rubber, artificial leaves.
Let's get creative:
- Cut out two circles from cardboard that match the diameter of the glass bowl.
- We glue the angels into the center of the circle and decorate it with half beads around the base.
- Apply glue along the edge of the workpiece and press the glass tightly against it with the stem up.
- We decorate the glued edge of the glass with a string of beads.
- From the base ball we cut off a part with a diameter slightly smaller than the stem of the wine glass.
- We glue roses to the rounded part of the ball, working from bottom to top.
- We fix the leaves to the edge of the cut.
- We decorate a bouquet of roses with hairpins.
- Glue the cut to the stem of the glass.
- Its base can be covered with a thread of beads.
