DIY panel of coffee beans: photo, master class, paintings, coffee cup, panel of cats from beans, how to make sunflowers for the wall, video.
DIY panel of coffee beans: step by step summary
Coffee is not only a beautiful drink, but also a good material. A striking example of this is a panel of coffee beans. Coffee is the most fashionable drink in the world, which has an unsurpassed aroma, rich color and a huge amount of necessary substances. Coffee beans are widely used in cosmetology, medicine, and in the near future - they perfectly complement the interior of residential premises. Coffee is used to make crafts, paintings, plots, decorations and, of course, panels, which perfectly complement any building style and are mixed with interior items and furniture.
How to make a panel from coffee beans with your own hands
Making a panel from coffee beans with your own hands is quite easy; you just need a little imagination, creativity, and free time, and a beautiful panel will be ready. What is useful for a panel made of coffee beans? Depending on the chosen plot, you need to take a certain number of coffee beans of a suitable color, glue, a base on which the beans and decorative elements for the panel will be glued. It can be buttons, pebbles, plants, hay, herbs, cinnamon. Nut shells mix well in a panel with coffee.
First of all, when working on a panel of coffee beans, you need to make preparatory notes on the base to which the beans will be glued, so that the sketch or plot comes out smooth and beautiful.
You can make an original decoration for your interior from coffee beans and a satin ribbon.
From coffee beans, a base blank, glue and a yellowish satin ribbon, you can make beautiful sunflowers. To do this, the center of the sunflower is marked in a circle on the blank, satin ribbons are cut into triangles, and the edges are doused with fire. Then, prepared scraps of satin ribbon are glued around the sunflower circle, and the middle of the circle is filled with coffee beans. If sunflowers are meant to be created on a stem, then the stems are created from materials at hand: laces, ropes, cardboard, etc., gluing them to the workpiece with glue. When the panel is ready, you can frame it or decorate the contours with auxiliary materials: hay, grass, cinnamon, etc. The coffee bean panel is ready, you can decorate the interior.
Coffee heart
You can make a coffee topiary with your own hands in a variety of shapes. One possible option is the heart.
To make it, draw a heart on paper, cut it out and trace it on cardboard. You need to make two cardboard hearts.
DIY coffee tree topiary. Photo
We wrap two wires of the required length in paper and glue them to the heart.
Glue cotton pads onto the cardboard surface, and cover the top with a second cardboard heart. This will create volume.
The outside of the resulting heart also needs to be covered with cotton pads. To give the required shape, it is wrapped with threads.
Paint the resulting base with brown paint. Then we glue coffee beans onto its surface.
Glue ice cream sticks to the iron can in a circle.
Wire. We wrap the one glued to the heart with jute thread.
We attach a sponge to the resulting pot, and in it we place the trunk of a coffee topiary in the shape of a heart.
We decorate the surface of the pot and the topiary itself.
Creating a cat panel from coffee beans
In order to make a panel of cats from coffee beans, you need to prepare all the tools and materials.
We will need:
- Canvas or base on which cats will be depicted;
- 2 stencils with silhouettes of cats that can be cut out of paper without the help of others;
- Coffee beans, preferably several tones, to create a color scheme and several light-colored coffee beans to create the effect of cat's eyes;
- Glue or silicone in a can, or mounting adhesive;
- Decor items: cinnamon, hay, artificial butterflies, etc.
In order for the product to look closer to reality, it is recommended to varnish it
When all the tools are ready, you can start. On the canvas, outline the silhouette of cats with a regular pencil or soap (depending on the base material) and roughly lay out the coffee beans, choosing black colors around the edge and light colors for parts of the body: paws, ears, tip of the tail. If you use plain coffee beans, the panel will look silhouetted. After approximately placing the grains over the area of the canvas, you can glue the grains to the base. To do this, take glue and apply droplets to each grain, after which it is pressed tightly to the base. You need to know that the glue is applied specifically to the coffee beans, it cannot be applied to the base, otherwise the sketch will not stick. After the cats are ready, you need to stick the light grains in the eye area vertically. After which, the grains can be coated with varnish or paint and decorative elements can be added: flowers, butterflies, cinnamon sticks, etc.
Coffee topiary
In order to “grow” a tree you will need:
- foam ball;
- coffee beans;
- twig or thick wire;
- flowerpot;
- elements for decoration;
- alabaster;
- hot glue gun.
First, sort the beans by size and quality. Leave the best ones on the top layer. Hot glue the first layer of grains with the grooves facing down. Don't forget to leave room in the center for the barrel.
Now glue the second layer - grooves up.
Make a depression in the center of the ball (using a screwdriver or a branch). Secure the barrel with glue. Fill the voids around it with grains. Decorate the trunk. You can wrap it with jute or satin ribbon, paint it with acrylic paint, or leave the branch in its original form.
Make a solution of alabaster and water. Place the tree in the center of the pot and fill with the mixture. Wait until it sets and hardens a little.
When the plaster is completely dry (a day or more), you can prepare the base. Cover the area around the trunk with sisal or pebbles, moss or coffee beans.
Panel “Coffee Cup”: we do it ourselves
For this panel you will also need canvas (base), glue, coffee beans, ground coffee, decorative elements, and the neck of a plastic bottle. This panel will be voluminous.
This panel can be decorated with additional parts
Work begins on placing the parts on the base, making notes with a regular pencil.
Then work begins on the cup itself; to do this, you need to cut the neck of the bottle in half and cut off the upper part in the shape of a month, leaving gaps along the edges; this will be the cup.
Glue coffee beans of a suitable tone onto the cup and glue the cup with gaps to the workpiece. The bottom of the cup is made flat, on a blank. To make the smell coming out of the cup, you need to take ground coffee and place it on the workpiece, having previously coated this place with glue. You will get a natural cup of fragrant coffee. After which, the panel is decorated with decorative elements: grass, flowers, candied fruits, etc. Such a coffee panel will successfully decorate the interior of the kitchen, hallway and even living room, and can serve as a beautiful holiday gift.
How to make a panel “Coffee Cup yourself” (video)
Topiary made of coffee beans as part of the interior
The divine aroma awakens the body, fills it with energy for a new day. A cup of this delicious drink in the morning puts you in a positive mood. It is quite possible to feel not only the taste, but also the smell throughout the day if you place it in your workplace or decorate your living room with such a detail. She has the ability to revive absolutely any home.
Fashion designers are happy to use such an accessory in their decoration - it can emphasize and complement the color scheme of the space in mint tones. The versatility of this element allows it to be used both in residential premises and in offices or cafes.
How to make a panel of coffee and beans
To create more fascinating scenes and landscapes on panels, use coffee beans along with beans. How to make a panel of coffee and beans?
It is not necessary to use coffee as the main material for the composition: a good solution would be to use beans for the background of the upcoming panel
To do this, also make approximate marks on the base of the panel and begin laying out the beans. The beans serve as the background, the main color, and the coffee beans serve to create color, lines and edges. Using beans and coffee, you can make a beautiful lady's silhouette of a figure, a face, depict a heart from two halves, beautiful flowers, make silhouettes of cats in two colors, one cat silhouette can be from coffee beans, and the second from beans .
What is coffee roasted on?
Roasting coffee is essentially “cooking” and the goal here is obvious - to prepare the product as tasty as possible, to reveal the maximum potential of the raw material.
They “cook” not in the kitchen, but on professional technical equipment - roasters; the roast master acts as a chef, and it is he who decides what and how to roast. A coffee roaster is, simply put, an oven that transfers heat to the beans through convection, conduction and radiation. There are two main types of roasters: some roast coffee in a pseudo-fluidized bed, mainly due to convection, while others mainly transfer heat using thermal conductivity (conduction) of drums. Each of them works differently, but is good in its own way, and you can roast coffee perfectly on any of them; here the “cook” is more important than the equipment.
Paintings and panels made from coffee beans
A master class on making paintings and panels from coffee beans involves a fairly similar method of action.
For this you will need:
- Blank (fabric, cardboard, plastic, etc.);
- Glue, scissors, thickened rope for a loop, thread, needle;
- Coffee beans;
- Decorative elements: beads, buttons, pebbles, herbs, spices, etc.;
- Details for framing panels and paintings: sticks, matches, pods, etc.
In order to facilitate the design of the composition, you should apply a small drawing to the workpiece using a regular pencil
You need to place the workpiece on a flat surface and fix it so that it does not move. Align the edges of the workpiece and trim as necessary. Lay out the desired plot from coffee beans and mark its edges with a pencil or soap. Open the glue by applying a drop of glue to each coffee bean, apply to the workpiece and press firmly. Wait for 10 seconds and begin gluing subsequent grains. When the plot is ready, you need to take the work into a frame from the prepared materials, gluing the elements with glue, and also make a loop of threads on the inside of the work in order to hang it on the wall. The last element is decorating the work with decorative elements. After the work is completed, throw it in a horizontal position for 20-30 minutes, and then hang it in a specific place or give it as a gift.
Owl made from coffee beans
Animalistic motifs look interesting and beneficial in the interior. Materials:
- picture frame;
- grains;
- glue.
Note!
How to make wooden shelves with your own hands - original design options
- Kinusaiga technique for beginners: what is it, a description of creating paintings from threads
How to weave a figurine from rubber bands: how to learn to weave animals, toys and what you can make from rubber bands on a slingshot
Master class step by step
Take the frame as the basis for your future painting. Draw an owl in the center, as your imagination tells you.
Remember that the owl has large round eyes, this can be played up in interesting ways. The location of the eyes must be marked in advance.
Start gluing the grains from the center, placing them one side up. This way the pattern will look neat. Make ears and paws. Using a knife, cut out the eyes and fix them on the marked places.
You can make eyes from large dark buttons. Cut out the owl's nose and glue it below the eye line. The beautiful bird will be ready after complete drying.
How to make a panel from coffee beans (video tutorial)
The costs of such work will be less than buying finished work from a store. Work made from coffee beans can be stored for quite a long time if it does not have mechanical damage.
Cat bean panel.
We will tell you how to make a panel of beans - Cats in our master class. Such an original panel will decorate any interior, despite the fact that the work costs will be minimal. Beans can be purchased at any grocery store. All you need is a photo frame, beans, gouache and glue. No special artistic talent is required here, the sketch is very ordinary.
Materials for the panel:
- white and black beans
- photo frame without glass
- regular pencil
- gouache paints
- glue Moment Crystal or Hotmelt adhesive
- glue gun (if you are using hot glue)
Using a pencil, draw a sketch on the inside surface of the frame.
Paint everything with black and snow-white paint. This is so that there is a rich background.
To make an even circle, you can take something round, for example a plate. Trace the outline with a pencil. You will get what you need. Glue the beans.
For durability, you can coat the top of our painting with varnish. But this is not necessary. We put on the frame. The panel is ready.
Picture of coffee beans for kitchen decoration.
Nowadays, a painting is not just a sketch with paint on a canvas; to create masterpieces, painters resort to different materials and forms. In the near future, paintings made from coffee beans are gaining popularity. This product produces simply unique works of art. Do you want to try making such a masterpiece with your own hands? It’s painfully simple, in this article you will find a huge number of lessons with detailed explanations in the photo.
Panel
Widespread coffee products are panels. The cloth will fit harmoniously as a background, especially if you plan to not completely fill the space with grains. The sketch can be done without any accessories, or you can get creative with various ribbons, beads, and rhinestones.
It is worth taking care of the tools - it is convenient to use a glue gun. You will also need a simple pencil with a soft core, the canvas itself, plywood, replacement cartridges for the heat gun, PVA, and consumables.
- Smooth the fabric with an iron so that there are no wrinkled areas visible on it. This will make your work much easier and improve the decorativeness of the sketch.
- Then coat the wooden surface of the desired size (can be replaced with very thick cardboard) with PVA and evenly distribute the fabric on it, taking into account that the flap should slightly exceed the dimensions of the base. For neatness, fold the edges of the material to the wrong side.
- While the back plank is drying, think over a detailed sketch on paper, then transfer it to the canvas with a lead pencil.
- Lay out starting from the center of each element, attaching the grains with glue.
- When finished, coat the image with clear varnish and attach a baguette frame.
Kitchen decoration
This master class will tell you how to make an unusual panel from coffee beans, which will fit perfectly into any kitchen and will give the room the warmth of home comfort.
To work you need to prepare:
- Sheet of cardboard;
- A piece of fabric, in color harmonious with the composition;
- Glue;
- Coffee beans;
- Leg-split;
- Stencil;
- Picture frame;
- Clear nail polish;
- Various decorative elements (beads, ribbons, etc.).
In fact, making a picture from coffee beans is not at all difficult; for this you do not need to have any unusual creative abilities, but you will have to put in some hard work and diligence. The main thing is to do everything carefully, don’t rush and don’t give up halfway if something doesn’t work out.
So, take a cardboard sheet (for reliability, you can use thin plywood) and wrap it in fabric, gluing it on the back side. Come up with an image that you will make from coffee beans, you can use a template. Draw the design on the fabric using light strokes. Now you need to glue the coffee beans onto the sketch.
Now all that remains is to decorate the background, varnish the picture and put it in a beautiful frame.
New Year's crafts from coffee beans
For the winter holidays, you can surprise your family and friends with an unusual decoration - a coffee tree. You can easily create this decorative element with your own hands if you approach the work carefully.
Materials
- Foam cone;
- The container in which you will place the Christmas tree;
- Gypsum, water, silicone;
- Twine or twine;
- Coffee beans;
- Dried orange slices;
- Wire of various diameters;
- Sackcloth;
- New Year's decor.
Stages of work
Select a cone based on the height of the future tree. Thread a thick wire into the center of the base. From the base of the cone, begin to wind the rope tightly, gluing it every two or three turns. Secure the end to the top. Also wrap the tree trunk with twine.
Now it's time to move on to the grains; arrange them according to size, and attach the largest ones with the flat side down at the base of the cone. Continue pasting the workpiece, gradually reducing their size closer to the top. Cover the free spaces with smaller grains, gluing them upside down for contrast.
Add gypsum to the container and place the tree trunk in it. Use support to keep it perfectly vertical. Wait until it hardens completely and wrap the pots with burlap. To do this, cut a square along the height of the flowerpot with a margin of about 5 centimeters for bends.
Place the container in the center of the square and fold the two opposite sides and the remaining two. Lock them down. All that's left to do is add the finishing touches with dried citrus slices, star anise and glitter.
Please note that you can make other interesting New Year's souvenirs - gilded and silver-plated stars, toys, hearts, animals decorated with beads, rhinestones, and lace.
Here, the implementation of ideas depends on your imagination. Making such decorations is a fascinating process in which you can involve children so that they can take part in preparing the holiday.
Gift for lover
Girls love gifts so much, and if a man makes one with his own hands, it will cause indescribable ecstasy, and the lady will keep this in mind for the rest of her life. And girls really adore cats and the smell of a coffee drink, why not combine all this and make something pleasant for your beloved. And, of course, a lady is also able to make such a picture for herself or as a gift to her family and friends. In this tutorial you will learn how to make a painting “Cats in Love” from coffee beans and beans.
Of course, the photo does not convey all the beauty of such a masterpiece, but when you make it yourself, you will make sure that coffee and beans are a perfect combination. The contrasting combination of snow-white and dark looks very profitable in a joint composition.
A little secret: coffee beans are not always particularly black; in order for them to darken, the beans can be fried a little in a frying pan (without oil, of course, in a dried frying pan).
First, print out a template or draw your own.
The stencil must be transferred to the base; it can be plywood, a thin board, or a sheet of thick cardboard. Now you need to decide which color will dominate on your canvas: if it is dark, then we will lay out the background with coffee beans, and we will make cats from beans. If you want to make the pussies dark, then we work on the contrary, the background is made of beans, and the cats, accordingly, are coffee.
Now you just need to lubricate the base with glue and place the grains and beans on the canvas; when the work is completed, put the picture aside and let it dry. The finished composition can be varnished, but then the enchanting coffee smell will not emanate from it, but it will be more durable. Frame your own masterpiece and you can safely give it to your loved ones or decorate your room.
Pleasant trifles
For creative get-togethers with your kids, you should choose simple craft options. These could be refrigerator magnets, cartoon figures, or simple applications.
What you can make from coffee beans with your children:
- sheep magnet. Draw a round torso, legs and head on the cardboard. Then cut. The template can be left for later adding sheep to the flock. Paint the workpiece with brown paint and dry well. Twist two ropes from the twine for the legs, fasten the beads at both ends and fold them in half. Secure with glue on the back of the body. Starting from the edges, cover it with grains. Lubricate the sheep's face with glue and line it with twine. For the eyes, you can use beads or ready-made parts. Attach the muzzle to the body of the sheep. Attach a small magnet to the back side. In this way you can make different versions of magnet figures. For example, a horse or an owl;
- applique "Cats". On thick tinted cardboard, draw the outlines of a cat and a cat. Make a frame of grains around the perimeter of the picture. Fill the outlines of the animals themselves with grains. Or, if desired, fill one shape with coffee and the other with small white beans. Additionally, it can be coated with aerosol varnish;
- horseshoe. Cut out a blank from thick cardboard in the shape of a horseshoe. Spread liberally with glue and wrap the twine tightly. A cute monkey will help bring this craft to life. To do this, transfer the monkey drawing you like onto thick cardboard. An outline will suffice. Cut it out and apply glue to it. Now lay out the animal’s face and paws with twine. Make the body and hair using grains. Use ready-made eyes or glue beads. Glue a ribbon loop on the back side. Place the horseshoe in the monkey's paws. A cute craft is ready.
Some tricks
In order for the process of creative activity to bring you only positive emotions, and for the products to come out more beautiful, it is not necessary to have unusual talents for art. All you have to do is follow some advice.
- For your own creativity, you should use only high-quality materials. But this does not mean that you need to buy all the most precious things in the store. Absolutely not, not cheap is not always not bad. It’s quite easy to study the composition, look at the country and manufacturer, and find out the overall quality by eye. This will be completely enough;
- You don’t have to limit yourself to just repeating other people’s work. At the beginning, you can watch different master classes and learn from them. But later it is better to create your own masterpieces. Other people's works should only encourage you, maybe direct you to a certain thought, but not be a clear copy of your idea;
- The key to success in any activity is love for work and dedication. If you feel that this is yours and you like to engage directly in this particular creativity, continue to follow in this direction. The work will be of high quality only when the master himself enjoys it.
coffee tree
Another relevant decorative exhibit made from grains is trees, or as they are called, topiaries. There are many video master classes on the Internet that reveal the intricacies of designing interior decorations, but it is the tree with mocha foliage that is distinguished by its elegance.
The list of raw materials and tools is as follows:
- Whole bean coffee;
- Thick wire;
- Twine;
- Styrofoam;
- Glue gun;
- Stationery knife;
- Textile;
- Lace;
- Dye;
- Cotton pads;
- Pot for indoor plants;
Manufacturing instructions
- Fill the container with a suitable piece of foam and secure. For the base of the topiary, you can use either a flower pot or a mug. So that in appearance it does not fall out of the overall picture, you should wrap it in canvas or initially select a suitable print.
- Insert the rod in the middle and bend it. If you cannot find the wire, use a pencil. You can build a covering for the “trunk” from twine, wrapping it around the circumference and strengthening it with “Moment”.
- Cut out a crown from the filler - it can be represented by a heart or just a circle. Place cotton wool cosmetic sponges on top and secure with a tourniquet.
- Paint the top with brown gouache, wait until it dries and decorate with grains.
- Decorate with ruffle bows of a different color, rhinestones or bugles. Dried rose petals at the foot of the stem will look elegant, especially if the topiary is made for Valentine's Day.
DIY cereal paintings
Yes, such colorful relief paintings are created from ordinary cereals. You can use anything, but in most cases such canvases are made from:
- lentils;
- rice;
- millet;
- buckwheat
But first the cereal needs to be cooked. To do this, it is sorted to remove impurities. If it is “clean”, then you don’t have to do this, but immediately proceed to the second step. If your panel uses an uncharacteristic color, it must be painted. To do this, take light grains, for example, rice. It is placed in a techno bowl, gouache or acrylic paint is added, and thoroughly mixed. Then they are dumped onto paper in one layer. Allow to dry and use for creativity.
But not all grain paintings require grain colors. So, you can use snow-white rice or semolina, brown buckwheat, yellowish millet. In addition, you can take other bulk materials available in the kitchen: seeds, peas, pasta.
For a picture of cereals, you will need a photo frame with a backing. You can buy an inexpensive one that has a plastic film on top instead of glass.
Wonderful children's drawings
If you and your child want to make such a panel, then start by drawing the future picture. To do this, use a regular pencil. Try not to press too hard so that the lines of the stylus are not visible in the finished work.
To do this, first glue a sheet of paper onto the backing. In this case, use pink, and then create a graphic base for the future composition.
If a child can draw a picture himself, then let him do it. In the meantime, prepare your materials.
Start filling the canvas with a small piece. It's better if they are closed. Cover the piece, in this case one flower, with a brush dipped in PVA glue, sprinkle it with cereal of a suitable color. Contrast details can be added by gluing yellowish millet between the grains or directly onto their dried tea.
The top of the second flower consists of buckwheat, the middle part and bottom are also made of millet. Tell your child that the trunk of a plant will look great if you glue halves of dry peas onto it. You can coat each large element with PVA and glue it, while for attaching small grains it is more convenient to apply glue to the base.
It is also better to glue the bean grains framing the vase one at a time, applying PVA to each one. Inside the vase you can place pasta, which also looks great, and you will soon be convinced of this again. Place the picture in a frame and hang it on the wall.
Making pasta panels
Continuing the theme of paintings from bulk goods available in the kitchen, we can tell you how to make such a wonderful canvas.
It will be useful for him:
- frame with a strong plywood or cardboard base;
- PVA glue;
- semolina, buckwheat;
- peas;
- pasta in the shape of a spiral, horns, tubes, rounded;
- sponge.
Draw with a pencil one large and 2 small trees, a wavy path, and a mill. Start decorating with the background. Cover it with PVA, sprinkle semolina in a thick layer so that it covers the entire suitable part of the picture of pasta and cereals. Be careful not to get it on other elements of the panel, but if a few small grains stick to them, it’s okay. Lightly press the semolina with a sponge for the best contact with the canvas.
Now lubricate the tree trunk with PVA, stick buckwheat to it. Attach the pasta to the top using glue as shown in the photo. Decorate 2 small trees in the same way.
The mill blades are made of pasta tubes, and the building itself is made of dry pea halves. Make a path from spirals, then let your unique creation dry. While this is happening, other noteworthy works of art can be created using egg scraps.
Styles of decorative panels
Ideas for decorating walls in various styles.
Modern
A design with a carefully thought-out theme, ideal geometric shapes and straight lines will be an excellent option for a multifaceted and logical modern design. Marble, glass, plastic elements or varnished surfaces are considered a relevant and winning solution.
The photo shows a plastic panel on the wall above the bed in a modern-style bedroom.
boho
This style personifies life and freedom and allows you to combine incompatible things. Here it would be appropriate to decorate the wall with woven panels using the macrame technique, compositions made of wool, yarn or floss.
Provence
For Provencal design, wall decorations using the decoupage technique, aged products, panels depicting still lifes, lavender or sunflower flowers, ancient streets, village landscapes, animals, plants or other motifs inherent in this style are perfect. This design will bring even more romantic mood, lightness, naturalness, warmth and comfort into the atmosphere.
Classic
The artistry of the classic style can be emphasized by panels in warm golden, herbal or silver tones. Plaster, mirror, fabric, openwork forged or carved wooden products, tapestries and other decorations will not stand out sharply from the overall interior design.
Country
For democratic and soulful country, patchwork compositions, quilts or appliqués, as well as ceramic installations and decor made of wood or boards are perfect.
Loft
The industrial style, filled with life, air, space and the absence of stereotypes and frames, can be decorated with photo wallpapers with thematic images of cities, bridges, roads or skyscrapers; modular installations made of rusty metal or aged wood and sections of timber with burnt or painted black marks would also be appropriate. paint, drawings.
Shabby chic
Floral light and airy compositions, products using the decoupage technique with a crackle effect, panels with a touch of antiquity, decorations made from fabric ribbons, beads or buttons will bring even more vintage to the shabby chic style interior.
Eco style
Natural and maximally natural eco-design can be created using installations made from sea or river stones, branches, leaves, fresh or dried flowers, palm fiber, jute, moss or other natural materials.
The photo shows a modular decorative panel made of moss on the wall in the living room in eco-style.
Steampunk
Decorative panels made of glass, stone, leather or metal would be appropriate for this direction. A particularly original solution would be a composition of gears with tubes, chains or plates.
Oriental
The magical and fairy-tale oriental style is distinguished by its special magnetism; compositions made of ceramic tiles, mosaics or decor decorated with carved ornaments are suitable here. The Japanese direction will be characterized by wooden, bamboo, rattan panels or products made from rice paper and fabric.
The photo shows a Moroccan-style bathroom with a wall decorated with ceramic tile panels.
Shell mosaic
Don't be surprised when you find out what this beautiful mosaic work is made of. Crushed eggshells became a good material for such a beautiful painting.
For a mosaic made from shells, in addition to it, you need:
- a sheet of thick cardboard;
a small wooden stick to press the shells (a sushi stick or a manicure stick will do);
- varnish
We start making mosaics with our own hands by preparing the material.
But you can take, for example, the colored shells left over from painted Easter eggs and boiled ones from regular ones.
First, a sketch of the future mosaic is drawn on cardboard. You can paste a picture from a children's coloring book onto it and create a panel directly on this base. If the shell is large, press it with your hands to get smaller pieces. If it is black and light or colored, sort it by color in advance.
You can post it in 2 methods:
- Paint the shells in different colors, lay them out individually, let them dry, then chop them up and start gluing piece by piece, choosing the right colors.
Choose the option that suits you best.
Now let's talk about how to make a mosaic from eggshells. Grease a small area of cardboard with PVA and attach several pieces to it. If you get a large piece, simply press it with a wood stick so that the shell cracks and falls apart.
After the work is completed and the entire canvas is filled with mosaic pieces, let the glue dry completely, then paint the shell if you used an unpainted one. When this layer is dry, coat the surface with varnish.
This is the kind of mosaic you can make with your own hands. There are a huge number of options, so choose which one you like best and get started.
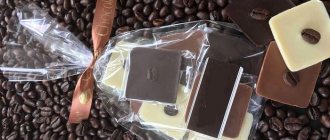
You can use other materials to make your own paintings, for example, coffee. Cute and delicious-smelling wall panels are made from it.
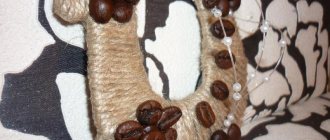
Crafts from twine and coffee
An extraordinary vase, cup or even flower pot can be made from twine and coffee beans. The simplest option would be a decorative scented candle, which you can not only use for aesthetic purposes in your home, but also give as a gift to loved ones.
Candles decorated with coffee beans look very original
To make an unusual candle you will need:
- scented candle
- leg-split
- glue or glue gun
- coffee beans
- clear varnish
Twine can be purchased at any hardware store or craft shop.
Making a decorative candle is very simple, and the end result directly depends on your imagination:
- First, you need to tightly wrap the candle with twine 2. This can be done around the entire circumference of the candle or to its middle 3. After this, use a glue gun to secure the ends of the twine to the candle so that it fits snugly to its surface, without protruding or forming a void . You can also do without glue by melting small sections of the candle and pressing the twine into the surface of the candle 4. The candle wrapped with twine is covered with coffee beans to the middle, doing this in rows, so that the layer of twine under the grains is not visible 5. At the final stage, the grains are painted with colorless varnish , which will provide shine and make it easier to wipe the structure from dust in the future
Instead of a scented candle, you can use a regular
candle. You can decorate the finished candle with beads if you want to give it a more festive look or immerse the beans inside the melted wax along the edge of the candle.