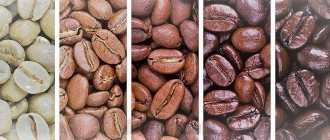
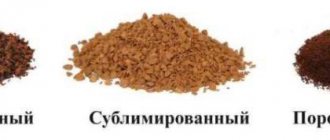
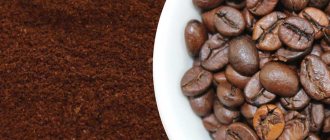
The degree of grinding of coffee is the size of the fractions in the powder that we get at the output.
This indicator greatly affects the taste of the finished drink. Different methods of preparing coffee, using coffee machines, coffee makers and Turks, require a certain degree of grinding. Let's look at this issue in more detail.
- Coffee in a drip coffee maker
What are the grinding degrees of coffee?
There are 5 main degrees.
Rude
This option is suitable for brewing coffee. The particles are very large, up to 1 mm in diameter. Ideally reveal the taste and aromatic qualities of the drink when brewed in a French press.
Average
The fraction size is from 0.5 to 1 mm. Suitable for use in carob coffee makers.
Small
This grinding is suitable for preparing a drink in a Turk. Particle size is from 0.5 to 0.1 mm.
For espresso
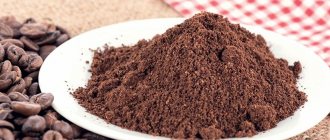
Almost powdery state. Ideal for preparing espresso in a coffee machine. The fraction feels like fine sand to the touch.
Powder
This is a super fine grind. The beans are ground to a powder and used to make oriental coffee.
Why is it so difficult to get good espresso at home?
Making espresso is fundamentally different from most other coffee brewing methods. This is because a much smaller brew ratio of water to coffee is used, and you brew a highly concentrated brew in seconds rather than minutes. These two settings mean that you need to pay more attention to your coffee grind settings. Especially if you intend to extract bright and subtle flavors from your beans.
Recently, more and more attention has been paid to preparing coffee at home at the level of a good coffee shop. Home coffee consumption has grown exponentially in 2020, thanks in no small part to the Covid-19 pandemic.
The coffee machine is often considered by home consumers as the most important piece of equipment for making espresso, but it is worth noting that it is not as effective without a good and accurate grinder.
A good espresso machine paired with a low-quality coffee grinder will not be able to achieve the desired grind and, accordingly, will not prepare you delicious espresso. Coffee shops and roasters use expensive coffee grinders that grind coffee easily and have flexible grind settings. Their high cost makes them inaccessible to the vast majority of home baristas.
In addition, manual coffee grinders can be used to grind espresso coffee. But this will require more effort and time from you (instead of a few seconds, this process will take several minutes).
How to adjust the grind level?
If you use ordinary, manual coffee grinders, then the only option here is to limit the process in time. The longer you grind, the smaller the fraction you will get at the output.
In more advanced models, as well as in the built-in coffee grinders that come with coffee machines, it is possible to manually adjust the degree of grinding. It is set either programmatically or manually, setting the desired value using adjustments.
How to set up espresso. Part 1.
Today we will begin a series of articles about setting up espresso.
The first part will be very primitive, but important, because... For most establishments, even such banal things as the presence of scales are something incredible.
Let's imagine that a person does not know how to brew coffee at all, but he needs to brew it, there are different situations. And let’s discuss in advance that this situation is hypothetical, and in real life only a barista who has undergone appropriate training should brew coffee.
This article is an instruction on how to brew acceptable coffee if no one knows how to brew it. Instructions for dummies.
The first thing I would like to say and what both baristas and establishment owners should accept is that the espresso needs to be adjusted and constantly ensure that it does not change. Never in your practice will there be a situation where you set up coffee once a month, week, day... and do nothing else. Coffee is constantly changing and needs to be monitored.
The 90s are long gone when a technician (a guy with a mustache) came to a restaurant once a month, or even less often, to change something and strictly forbade touching the equipment.
Now the barista must use all the tools that the equipment provides. And he must use this functionality consciously and skillfully!
Now let's get back to the instructions for dummies.
First, let’s briefly go over what is needed to have decent coffee in a coffee shop/bar/restaurant. An important note – normal! This is the lowest standard of coffee that can be given to a guest.
- Adequate coffee machine
- Decent coffee grinder
- Good coffee
- Coffee scales (preferably 2-3 pcs.)
- Timer (if not built into the machine and it is not included in the scales)
- Good tempera
- Good pitchers of different sizes (3-4 pieces minimum)
We’ll leave everything related to milk for later, and now let’s just talk about espresso.
The first and most important thing that must be behind the bar is a coffee scale. If you don’t have them, you need to purchase them urgently; without them, it is not possible to brew coffee that can be given to a guest. Dot.
The first thing we will do is to weigh each time how much dry coffee we grind, note the time and monitor the weight of the finished drink (using scales and a timer!) This is extremely important, you cannot weigh it once every 5 preparations, once a day, etc. options . Strictly every time.
There are times when you come to the bar and ask: “Guys, where are your scales?” - Yes, right there, in the bottom drawer.
The scale shouldn't just be behind the bar, it should be in the workplace, turned on and used for its intended purpose every time a cup of coffee is brewed.
- But why weigh it, you can set it in a coffee grinder... ???
- But why, in a coffee grinder you can ask... ??? - No!
If you have a coffee grinder that accurately produces a given weight, then with a high probability you haven’t read this far) We laughed somewhere at the beginning and went to look for more in-depth articles about coffee extraction. You just don't need this article)
With rare exceptions, coffee grinders grind according to time; they do not track how much coffee has been poured into the holder. The task of the coffee grinder is to turn on the engine for xx.xxx seconds. and that's all. How much coffee gets into the coffee grinder holder during this time is not particularly interesting. And for us, to prepare the drink, the weight of dry coffee (dose) is critically important. Changing the dose by 0.5 g will give a noticeable change in taste.
In addition, coffee is very sensitive to its environment and can change its density throughout the day, and all beans vary slightly in size and density. Because of this, at the same time, each time a different number of grams will be ground. coffee.
It is critical always weigh the dose.
We've sorted it out. It is critical always weigh the dose. If you decide to do it by eye, it’s better not to brew coffee at all! It is much better if the establishment has no coffee at all, and there are many examples of this.
With the introductory part done, let's get to the espresso!
We will brew according to brew ratio (BRT – the ratio of the weight of the finished coffee to the weight of the dry coffee). BRT=double espresso weight/dose
This parameter shows how dense (concentrated) the drink will be: the lower this value, the closer to ristretto our espresso will be, the higher it is, the more “lunged” the coffee we will get. The average BRT = 2, this value was obtained empirically, and we will rely on it.
The next parameter is the dose.
Choosing the right dose depends on many variables, but since these are instructions for emergency situations, we will choose a dose equal to 18 g. In future articles we will look at what you should pay attention to when choosing a dose, for now we will sacrifice this espresso setting parameter.
Why exactly 18 gr.? Because most of the meshes in holders are designed for just 18 g. We will not consider meshes for 20 g or more; the probability that a mesh larger than 18 g came with the car in stock tends to zero.
At 7, we immediately remove the grids as far as possible and forget about their existence; it is impossible to brew adequate coffee from it in the case when the barista does not know how to brew, or is in the learning stage. If the barista knows how to brew something adequate in a 7 g mesh, he will explain why this mesh should be immediately removed and forgotten about)
We decided: BRT=2 Dose=18g.
Accordingly, the weight of the double espresso at the outlet (hereinafter, for convenience, just espresso) should be 18 * 2 = 36 g.
But we have one more very important parameter - this is the extraction time (this is what we will call the time from turning on the group to turning it off in seconds). The choice of extraction time is as important a parameter as the choice of dose, but now let’s simplify the problem as much as possible and take average value is 25 sec. In practice, the extraction time, as well as the dose, is selected based on many parameters, as well as temperature, and what’s more, pressure. We will definitely talk about all this in future articles.
What we have? Dose = 18g. Espresso weight 36g. Extraction time 25 sec. And as a consequence BRT=2
All that remains is to decide on the grinding. Most people who encounter coffee believe that grinding is the most important thing and frantically turn the handle (disc) back and forth, completely not paying attention to the dose, the weight of the espresso, or the extraction time. So how do you choose the right grind for espresso?
How to choose an espresso grind?
In fact, we have already set the desired grind in the previous steps. Now all that remains is to set the desired grind value on the coffee grinder so that it corresponds to the values set above (dose, extraction time and espresso weight (hereinafter we will call these all settings)).
How to do this? It's actually quite simple. Having set ourselves the necessary settings, we set the parameters of the coffee grinder. This means that we will not be able to cook 36 grams with the wrong grind. espresso from 18 gr. grains in 25 seconds (our settings).
Having set the settings, we simply follow the algorithm and thereby set the correct grind on the coffee grinder.
- We fill the cup on the scales and place it under the group.
- Pour 18 g of coffee into the holder (by scale! ), try to distribute the ground coffee as evenly as possible throughout the entire volume of the mesh (we’ll also talk about distribution separately)
- We temper with a force of approximately 10 kg (the skill will have to be developed by training with large weights)
- Under no circumstances should we tap the tamper on the holder; at most, you can carefully shake off the coffee dust from the sides of the mesh so that it does not erase the gum in the group.
- Carefully insert the holder into the group without any sudden movements or impacts.
- We turn on the spill and at the same time turn on the stopwatch.
- We wait exactly 25 seconds and at 25 seconds we turn off the flow.
- Let's see how much weight we have in the cup.
- If there is 36 g in a cup - perfect! You have successfully set up your espresso. You can try it, and if you don’t know what to do next with it, but you need to give away the coffee, then you can stop at this stage. At the same time, you understand that you are giving your guests a drink brewed at 3 minus.
- If there is more than 36g in the cup, then we reduce the grinding on the coffee grinder (most often indicated by the word FINE). This must be done strictly on working millstones, otherwise the coffee grinder may jam if there is less than 36g in the cup, then we increase the grinding (usually indicated by the word GROAS)
- After changing the grind, it is necessary to grind 15-30 g of coffee so that the remaining coffee from the previous grind comes out of the coffee grinder. Use a special glass for this. This coffee (resin) can be used in the kitchen to decorate desserts, or in the morning to boil the car. Guests are not allowed to cook smol.
- Let's repeat it all over again
- We do this until we have 36 g of espresso in 25 seconds from 18 g. ground coffee.
Settings – a specified set of coffee parameters. Dose, weight of espresso, extraction time. Next, we will add temperature, tempering, pressure curve in the group, etc., but the main ones are the first three.
Half the job is done, we have set up the “technical” espresso. This drink is a half-measure, but, unfortunately, even this is not brewed in a huge number of establishments. Most often they simply pour it by eye, temper it anyhow, and pour it until as much as is needed, also by eye. Covering up your inability to cook with a bunch of excuses.
Should I weigh it every time? Yes, my bar will work like that!
There can be any excuses and as many as you like, but delicious coffee will only come with good equipment, grain and a diligent attitude to work.
Is it possible to cook delicious food with poor equipment? Yes, but it's very difficult and not worth it. The barista will quickly get tired of dancing with tambourines, and he will leave.
Is it possible to brew delicious coffee from bad beans? No. Here, even the most experienced and positive-minded barista will quickly give up this idea. But you shouldn’t give in to the easy way of calling any coffee bad. Very often the barista is lazy to think and adjust, blaming the roaster: “They roasted poorly again.”
Now we have set up our “technical” espresso, what next? And then the most difficult thing: firstly, you need to make sure that each subsequent cup meets these parameters. To do this, you need to weigh and time each cup. And, if something goes wrong, immediately adjust the settings (in our case, grinding according to the scheme described above).
The next step is to try the coffee you brew and compare it with what you can taste in good coffee shops and try to understand what is different.
Here is an article on how to start understanding tastes.
- It's long and inconvenient! - Yes, if I weigh everything, I will never give orders - I have nothing else to do? — and I’m not a barista at all! ...
Once again, there can be any number of excuses, but if you want to brew good coffee, then you will have to weigh each cup, and nothing else.
In a good way, the first step is to go to the place where a good trainer will teach you how to set up espresso, he will put his hand on it, tell you about the tastes and all the parameters of the equipment with which you will work.
Above is a cheat sheet for a hopeless situation or “how to brew espresso for dummies”
In the future, we’ll look at what other parameters there are and how they affect the taste of coffee.
Espresso, how to set up espresso, setting up espresso
25.04.2121
Comments
What grind size should you choose for your device type?
As noted above, for a particular coffee preparation method, it is advisable to select the appropriate particle size. The most common options are discussed below.
Coffee in a drip coffee maker
Large particles are needed. They are retained in the filter and do not end up in the drink (see how to make a paper coffee filter). The coarse fraction produces the best taste when brought into slow contact with boiling water.
French press grinding
This device uses the infusion method. Large particles are ideal for this. The drink needs to be brewed for 5 minutes. During this time, it will be filled with the necessary taste and aroma.
For making espresso
The optimal time for preparing this drink in a coffee machine is around 20-25 seconds. During this time, boiling water under pressure manages to pass through very small particles. The fraction should feel like fine sand to the touch.
Larger particles will allow water to pass through very quickly - the espresso will be watery. The powder fraction will lead to excessive bitterness and unpleasant taste.
Grinding for Turkish coffee
Traditionally, oriental coffee was prepared in a Turk, using the finest grind. This allows you to achieve such a unique taste and aroma. In this case, the grounds quickly settle to the bottom and do not interfere with the process of drinking the drink.
Brewing in a cup
The same principle as for cooking in Turk.
Methods for preparing ground coffee in a cup
There are many ways to make coffee. Each nation has created its own unique recipes. An avid coffee drinker has one, at most 2, preferred methods of preparing coffee, selected from the great variety ever created.
It makes sense to try all the recipes described below. It often happens that a recipe that you stubbornly did not want to try becomes your favorite.
Brazilian way
Is a professional tasting method. Described in SCAE, COE regulations and other extremely important documents.
It uses lightly roasted, coarsely ground coffee. 200 ml of water requires 12 g of coffee. It is preferable to take cups made of glass or ceramics.
It is prepared like this:
- Pour coffee into a sieve.
- Bring the water to a temperature of 93°C. Pour it in a thin stream onto the coffee, evenly over the entire area of the sieve. Not a single coffee granule is missed.
- Stir the coffee and leave to brew.
- After exactly 4 minutes, remove half of the coffee grounds from the sieve. Enjoy the aroma of the drink. The second half is poured into a cup of coffee so that it lies at the bottom.
- Leave the coffee to cool to 57°C (2°C tolerance is acceptable) to get the sharpest flavor.
Polish way
With minor variations, it is popular in the post-Soviet space. The finest grinding of grains is used for it.
It is prepared as follows:
- Warm up the mug, put 2 tsp on the bottom. coffee.
- Bring the water to a temperature of 100°C. Pour it into a mug of coffee.
- Cover the mug with a saucer and leave to brew for 4-5 minutes.
Cold way
Making coffee this way takes a lot of time:
- Pour about 50 g of ground coffee into a mug.
- Add 250 ml of cold water.
- Infuse coffee for 10 to 24 hours.
- Strain the drink through a sieve.
Brewing coffee in the microwave
This coffee has a weak taste, but coffee is prepared quickly in the microwave:
- Pour 100 ml of water into a cup.
- Add 1 tsp. coffee, add spices to taste.
- Turn on the microwave for 2-3 minutes (the coffee may boil earlier).
- When foam appears, open the door and let the drink cool slightly.
- Repeat the procedure 3 times.
Useful tips
By following the following simple principles regarding grinding coffee beans, you will always be confident in the quality of the finished drink (can you grind coffee in a blender?).
- You need to grind the grains immediately before you start preparing the drink.
- There is no need to store the finished powder outdoors for a long time.
- The coffee grinder container must be clean and free of moisture. If you washed it, let it dry.
- It is ideal to use burr coffee grinders. They grind grains, preserving essential oils and taste.
Please leave your opinion about this article in the comments below!
Millstones, millstones, millstones...
So we've learned that grind precision is very important when it comes to making espresso at home. But how to improve it?
The answer is simple. Use coffee grinders that have steel burrs. They are responsible for the uniform grinding of your coffee.
There are two types of coffee grinders: conical and flat burr. Conical millstones consist of a lower ring-shaped and an upper cylindrical part. The coffee beans are ground between them and the ground coffee falls down a chute into a hopper or portafilter below.
In contrast, flat burrs consist of two ring-shaped parts and are considered more accurate.
AllGround flat burrs are made of food grade M340 steel and have a diameter of 64 mm, which guarantees a large surface area and avoids damage to the coffee beans.
The metal burrs are also designed to absorb more heat as they rotate, meaning the temperature of the beans remains stable throughout the process. Millstones coated with titanium will last much longer.
It is also extremely important that your coffee grinder is collapsible and easy to clean. Cleaning the coffee grinder burrs is very important as it removes old coffee grounds and residual coffee oil. If left unrefined, they can affect the flavor of your cup.
MILK
- For cappuccino, only fresh natural cow's milk with a fat content of 3.5 to 4% and containing 2.8-3.5% protein is suitable. In this combination, fats are responsible for the formation of elastic, homogeneous foam, and proteins give the drink that unique milky sweetness.
- Do not overheat. When milk is heated above 70 °C, denaturation (decomposition) of milk proteins occurs, and bitterness appears in the taste of the drink. Therefore, under no circumstances overheat milk above 70°C (optimally 60°C).
- Milk foam that is whipped correctly has a thick, homogeneous consistency that adheres to the milk and a glossy surface without large bubbles. You can check the quality of frothed milk by scooping out the foam with a teaspoon. If you turn the spoon over, the foam will remain on it and will drain very slowly. Properly whipped foam should have a sweetish-creamy taste, without the slightest hint of bitterness.
- Your cappuccino or any other drink with milk will never taste good without a well-tuned espresso.
Espresso extraction schedule
- If the espresso is over-extracted (over-brewed): the taste will be dominated by bitterness. The cup will turn out empty, rough, viscous and dry.
- If the espresso is under-extracted (undercooked): you will taste acrid, very pronounced acidity, bitterness and salt. The cup will be watery and flat.
What is a pod coffee machine
Let's start with the fact that the pod coffee maker does not represent a technological breakthrough. It is designed according to the principle of a conventional carob coffee machine. The basic difference is the design of the horn. In the pod model, the filter of the horn is flat and wide, so that a bag of ground coffee can fit into it.
The rest of the design and operating principle are exactly the same as in a conventional carob coffee machine. The water is heated and passes under pressure through a portafilter with a pod placed in it.
At the end we have ready-made coffee, strong and aromatic. After using the pods, we dispose of them.
The technology was invented by the Italians, who set the goal of improving the technology for making espresso and facilitating the endless cleaning of the horn that baristas are doomed to. The business benefit is obvious - the pods precisely calculate the size of coffee per serving, which facilitates reporting and makes coffee consumption transparent in catering establishments.
"Cialda" means "waffle" in Italian. Indeed, a coffee pod looks like a round wafer.
It's all in the pods
If everything is more or less clear with the device - it’s a carob coffee machine, slightly modified for pods, then what about the pods themselves? What are they and where do they come from?
A pod is a portion of ground coffee, weighing 7-9 g, packed in filter paper. One pod is enough to prepare a shot of good espresso. The pod filter paper is made from oxygen bleached cellulose and is completely neutral. It does not give any foreign smell or taste.
The pods have an outer packaging made of foil paper. For better preservation of coffee, an inert gas – nitrogen – is pumped into the packaging. The pods are similar in appearance to tea bags. But buying pods is not as easy as buying tea bags. The easiest and surest way is to order online.
The most common type of pod is ESE. It can have different edging, thickness is about 10 mm, diameter from 44 to 61 mm, designed for making espresso. Its abbreviation stands for: Easy Serving Espresso. You will have to choose pods for your coffee maker model.
Pods differ from capsules in shape and packaging technology. Therefore, capsule coffee machines differ from capsule ones. While pod coffee makers are designed like a carob coffee maker, capsule coffee makers have their own design with a device for piercing a hard capsule.
How to grind coffee without a coffee grinder
You can grind the grains using a blender or food processor. Measure out the required amount of raw material and pour it into the unit. Cover with a lid and turn on medium speed. The process will take about 30 seconds.
An immersion blender will do. Place the beans in a narrow, high-sided container and insert the blender. After 30-40 minutes, the grains will be crushed to medium-sized fractions.
A rolling pin works well. Place the beans on a board, cover with a bag and grind with a rolling pin until the desired degree of grinding is achieved.
Also suitable:
- hammer;
- knife;
- mechanical meat grinder;
- a blunt, heavy object.
For instructions on the above methods, see the article “How to Grind Coffee Without a Coffee Grinder.”
